Important notice about the future of Stripcreator (Updated: May 2nd, 2023)

stripcreator forums
Jump to:

Stripcreator » Photoshop Valley » How to use Paint

Author

Message

Injokester
Definitely drunk

Member Rated:

ATTENTION ALL USERS: Please do not post comics, pictures, or anything along those lines in this topic. I’ve set this up as a source of tech support for the SC community, so please don’t clutter the topic to show off your work- there are other topics/forums for that. If you do need assistance and need to provide an image, please just post a link instead of the image itself. Also please don’t quote lengthy posts (especially this guide), just copy the relevant section and add the [[/b]quote][ [b]/quote] tags yourself.

This guide covers the basics of using MSpaint to make stripcreator style comics with the various art that people have posted for use in the forums, in the quickest, easiest and most effective way. If you already know how to use paint, then skip the first part, which deals with how to use the program features.

I might make some more guides later covering how to draw/modify characters and backgrounds, how to use the basics of Photoshop, and some of the more difficult tricks, but in the meantime if anyone has any general questions feel free to post here or PM me for anything that only applies to yourself.

How do I open MS paint?

Start-->Programs-->Accessories-->Paint

How to use Paint

Once you open up paint, you will see a large white area- this is the canvas on which you can paint. To the left you will see these various buttons:

If you’ve never used paint before, take the time to try out each button and just make a bunch of squiggles to see what they do.

In addition to the buttons, a standard menu appears at the top of the window. Most of the options you should know, but there are some helpful ones to be aware of:

Edit-Undo: It doesn’t need explaining, but know that it’s there- you’ll need it.
Image-Flip/Rotate: Makes chickens rain from the sky.
Image-Stretch/Skew: Makes said chickens all wobbly-like.
Image-Invert Colors: Go on. Press it. You know you want to.
Image-Attributes: This section will let you change the size of your canvas area (very handy), and convert from colour to black and white. Stay away from the black and white- you can’t go back and it literally uses only black and white, no grey.
Image-Draw Opaque: Throughout this guide I refer to this as ‘transparency’, this is just another way to turn it on and off (very important).

[b][/b]
[b][/b]
[b][/b]
[b][/b]
[b][/b]
[b][/b]
[b][/b]
[b][/b]
[b][/b]

How to make a comic in Paint.

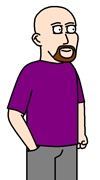
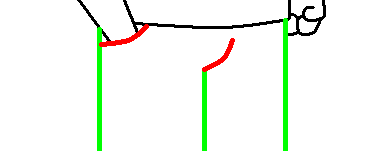
The important thing when making a comic in paint is to do as much as you can in Stripcreator. If you want to use an SC background, make a comic in SC using the ‘height’ props instead of characters, then just add the characters in paint. The same works for characters if you use no background.

The next most important thing to do is make sure you have transparencies turned on (from the sub-buttons on the Select tool- see the button descriptions guide), so that you can paste only the things you want to use.

To transfer the partly finished comic from SC:

• Press the ‘Print Screen’ key on the keyboard with the comic onscreen, open Paint, and use ctrl-v to paste it in. If you haven’t donated and can’t delete comics, don’t “make” the comic, just set it up and copy from the ‘make comic’ page in SC.

• Now use the selection tool in paint to drag it to the top left corner (you may need to zoom in (magnifying glass button) to get it nicely in the corner- get it close first and use ctrl-a to select everything once you’ve zoomed in).

• Drag the little blue square in the bottom right corner of the paint canvas (the area where you can draw) up to the corner of the comic (again, zoom in after it’s close).

Now you have a blank comic to work with.

To add a background or character:

Open a new window in paint (open the program again from the start menu).

Bring the desired background/character up on the screen, use print screen to copy it to the new paint window, and repeat the steps above so that it’s the only thing there. With a character use the selection tool to delete anything around the character.

If you are adding characters only: Use the Select tool to select the character, ctrl-c to copy, then go back to the original window with the partly finished comic. Now paste the characters over the top of the comic. Save it somewhere, host it, and you’re done. IMPORTANT: If a character has white in it, the white area will become transparent along with the background. There are two ways to fix this.-

• First option: Refer to the guide below for adding text bubbles (this is the best way to do it, but is a little more complicated)

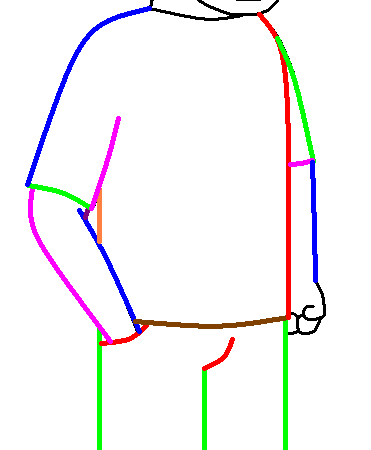
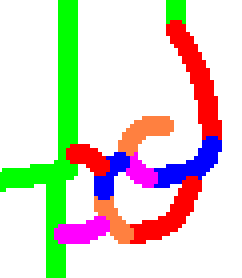
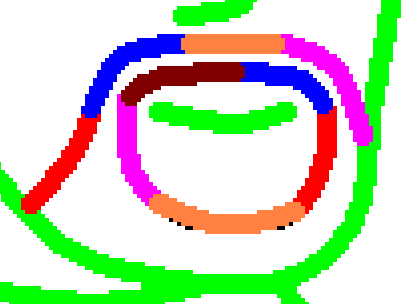
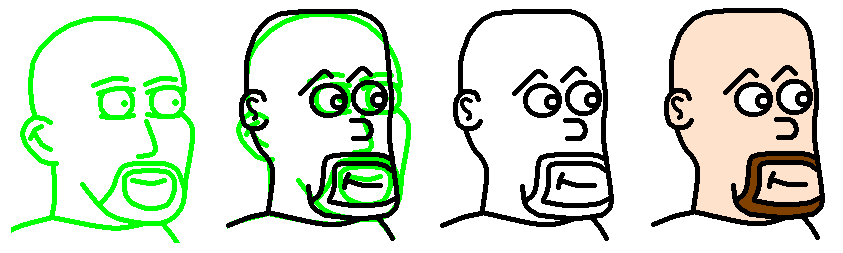
• Second option: Open a new paint window, and use the fill tool to fill the entire canvas with a colour that hasn’t been used in the character or the background (usually the fluoro green is the one to go for). Now paste the character onto the green, making sure that transparencies are turned on. Un-fill the area outside of the character (right-click with the Fill tool), leaving only the character on a white background. Copy the character into the comic (leaving the bright green inside the character). Finally, just un-fill all the bright green areas from the character in the finished comic. TIP: The best way to un-fill a lot of one colour is to select that colour as the primary colour, and white as the secondary colour. Then right-click with the eraser tool, and drag the cursor over the bright green areas.

If you are adding backgrounds: Bring up the original window, select everything and copy it. Open up a third paint window, and drag the blue square in the bottom right up near the top left corner (so that it’s really small). Now paste everything from the original window into the third window. Now go back to the second window (the one with the background), use ctrl-a to highlight the background, and copy it. Go into the first window and paste the background over each panel (so that it covers all of the white, the characters and the text). Finally go back to the third window, select all, and copy. Return to the first window and paste this over the top (this will put the characters and text back over the backgrounds you’ve just put on the comic. Save it, host somewhere and you’re done.

TIP: If at any time you see white anywhere that it’s not supposed to be, this means you don’t have transparencies turned on. Click on the selection tool, then on the bottom of the two boxes that appear below.

[/b]Making a comic using no SC art: [/b]

If you are making a comic that doesn’t use any stripcreator art the first thing to do is to make a blank comic in SC- no characters or backgrounds, and copy it to paint as per the start of this guide. Then use the steps to add backgrounds and characters, only with one exception- make only background only, and add the characters directly to that background. Copy the background with the characters directly into each panel of the blank comic to save making each panel individually.

To add text bubbles only:

This is a little tricky, so follow the steps precisely.

Make a blank comic in SC- no characters or backgrounds. Type in the text as normal, so that only the speech bubbles show up. Use print screen and copy to transfer it to a paint window. As soon as you paste this into a paint window DELETE it. This will make the paint widow the exact size of your screen.

Now double click on the light grey colour box in the colour palette. This will bring up a new window. Click on “Define Custom Colors”. On the right hand side you will see a bar that fades from black to white, with a little black arrow to the side. Click on the arrow and drag it ALMOST to the top. You want the numbers in the little boxes below to be between 250 and 254 (NOT 255- the maximum- which is pure white). This creates a grey so light that it looks white, but which won’t be transparent.

Use the Fill tool to fill the entire canvas with this very light grey.
Now paste the text bubbles (that you copies with ‘print screen’) into this window, making sure that transparencies are turned on. This means that all white areas will now be a very very light grey.

Use the Fill tool to un-fill (right click) everything outside of the text bubbles (where the background normally is, the area outside the comic, and the comic frame itself- in that order) so that all that is left are the text bubbles. You might not be able to see anything change when you do this, but what you are actually doing is changing the very very light grey areas back to white, so they’ll be transparent again.

Use the select tool to select all of the text bubbles, then copy, and paste onto the rest of the comic.

These steps might seem weird, as everything will look the same after you’re done as when you started, but they are important as they fill everything that was white inside each text bubble with a light grey that looks white, but which won’t be transparent when you paste it onto the comic.

TIP: If you are making a series of comics with the same characters, pre-make the comic and save it without text, so you can just add the text in for each new one. If you are using the same characters but different backgrounds, do the template with the characters only, or if you are using one recurring character just make the template with that character only.

Creating new headers

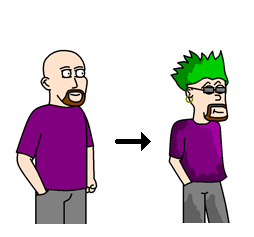
One of the best things about making a comic in paint is that unlike SC you can add your own touches, such as a custom header. To do this you will need to design the header yourself. The easiest way to do this is to just play around with the buttons in paint until you get the hang of them, then have a go at designing something and adding your own text over the top.

The idea is to create everything outside of the backgrounds in the comic. Make sure to leave the background areas blank- this way you can just copy the entire header onto the comics you make. The best way to do this is to create a blank comic in SC, copy it to paint and crop everything else, and then fill the background area with a colour you won’t use- such as the fluoro green. You can then delete everything else and just work around the green rectangles.

TIP: If you do make a new header, or anything else for that matter, I’d suggest keeping the proportions the same as Stripcreator. That way you can copy in the existing backgrounds without having to change anything, and most importantly, so that the speech bubbles are already the right width for each panel. You can change things around, but if you do you’ll end up creating a lot more work for yourself.

Tip: If you want to use particular characters a lot in these comics, make a separate template for those characters, so that you can just copy the whole template onto any comics you want them in. The best way to do this is to create a canvas that is 250 pixels wide and 350 pixels high (the size of the backgrounds). To do this press ctrl-e, and change the numbers in the width and height fields.

Well that just about covers the basics. Using this guide you should now have no problems customising your comics in paint.

---
Dinosaurs had eggs bro, the chicken came way later.

6-29-06 5:43am (new)
quote : comics : pm : info


Injokester
Definitely drunk

Member Rated:

Advanced guide: How to make GIF transparencies the easy way.

I did this previously, so I'll throw it in (it's not for beginners). If you've drawn a character and want to convert it to a SC compatible GIF transparency, this will show you how. Kudos to DexX who taught me everything in this part of my guide.

First of all, draw your characters at 400% of their final size. To enlarge to 400% copy a character and paste it to a large canvas in paint, use ctrl-w for the stretch menu, and change the horizontal and vertical fields to 400. To get an idea of the size you're after, do this to an existing SC character. 400% is also the default size for the magnifying glass tool in paint (you can use that tool and hit 'print screen' for a quick enlargement). Also make sure your character is on as small a canvas as it will fit on (leaving a 2-3 pixel empty border around the top and sides, with NO border at the bottom).

Once you've got the character drawn at 400%, open it in Photoshop and holding shift use the magic wand tool to select everything outside of the character, making sure to get any gaps (holes between the legs, arms, etc...). You don't need to hold shift if there aren't any gaps.

Press ctrl+shift+i to invert the selection, so now you have the character selected.

Now press ctrl+c then ctrl+v. This creates a new layer with all the white areas cut out.

Now go to Layer-->Layer Style-->Stroke. Change the number to either 1 or 2, and click on the 'color' box. This opens up a new window, where you need to drag the white circle in the fading colour field to the bottom right corner (pure black). 'OK' your way back to the character.

In the bottom right corner in paint you will see the layers section, with thumbnails of your character. Click on the 'eye' icon to the left of the 'background' layer. This will leave a chequered pattern around your character (which is actually transparent).

Now resize your character (ctrl+alt+i) so that it is no taller than 175 pixels and no wider than 125 pixels. You can make it any size you like, but these are the maximums for SC (and the bigger it is the better it looks).

Now go to File-->Save for web (or shift+ctrl+alt+s). This will bring up a new window. The preview here is what your finished character will look like. Here you will see a drop down labelled 'colors'. The number is how many colours will be used in the final character. In short- the more colors, the better it looks, but the bigger the file size will be (thus increasing loading times on SC). The default is 256, this is WAY too many for cartoon characters. Generally you'll need either 32 or 64 colours only. The trick is to change from one to the other while watching the preview, and see how much of a difference it makes. You want to use as few colours as you can, while avoiding any pixilation.

Finally, hit save.

Now, for SC, you'll need to do a reverse as well, once you've saved the first one go to Image-->Rotate Canvas-->Flip Canvas Horizontal.

TIP: If your character has anything that can't be reversed (eg: writing on a t-shirt), it's easiest to flip this on the original and save it as a separate file, then repeat the whole process for the second file.

And that's that. Now you have an SC compatible character.

---
Dinosaurs had eggs bro, the chicken came way later.

6-29-06 5:48am (new)
quote : comics : pm : info


Injokester
Definitely drunk

Member Rated:

Intermediate guide: How to make text bubbles.

You need a bit of experience with Paint for this guide, otherwise use the full version that I included in the first guide.

Too many times I’ve seen people stuff up text bubbles. Here’s how to do it quickly and easily so that they will look just as good as the real ones on SC.

-- Make a blank comic in SC (no characters) and type in the text.
-- Use print screen to copy this to paint. Immediately delete it.
-- Fill the canvas with an ultra light grey (dbl click the light grey colour, go to define custom colours, and drag the bar on the right almost to the top so that the numbers are all 252 or 253. 255 is no good- that’s white). The grey should look white, but since it isn’t actually white it won’t be opaque.
-- Paste the ‘print screen’ info onto this canvas, make sure you have enabled opaque mode (image-- >draw opaque).
-- Un-fill everything outside of the text bubbles
-- Paste the text bubbles onto a comic, make sure it is in opaque mode.

---
Dinosaurs had eggs bro, the chicken came way later.

6-29-06 6:00am (new)
quote : comics : pm : info


Injokester
Definitely drunk

Member Rated:

Intermediate guide: How to make nicely rendered Alien comics.

So far I've only got the templates made up for the aliens, but I'll be doing more and more later. Save these to your hard drive if you want to use them so you can just open them instead of wasting time with 'print screen'.

The templates I've made up are here:
http://s58.photobucket.com/albums/g245/Bob_Toomy/Strips/Alien%20Coffee/Basic%20Templates/

There are others (but they've all got my username/title on them so you'll have to modify them):
http://s58.photobucket.com/albums/g245/Bob_Toomy/Strips/Alien%20Coffee/Templates/

To use them, make sure opacities are enabled (Image-->Draw Opaque).

Open up the file containing the left character you want to use. In another paint window open up the right character. Just copy one onto the other, they're pre-formated to fit nicely. Add your text bubbles.

Finally you need to add a title and a username. Use the blank template (title.png) to create your own title template- delete the 'your text here' bits and write your name in, maybe add a background colour. Save this somewhere so you can use it whenever you like (or better yet, save it over the top of each 'left side character' template so it'll always be there.

And that's that.

---
Dinosaurs had eggs bro, the chicken came way later.

6-29-06 6:12am (new)
quote : comics : pm : info


Injokester
Definitely drunk

Member Rated:

IMPORTANT ADDITION!!!

Sorry, should have said before.

ALWAYS save your files as PNG format. The rest are total shite in paint, and will ruin your comics.

If you want to cut down on the file size, the way to convert is in Photoshop- open the file, go to file-->save for web, change the number of colours to the lowest number you can without losing quality, and save. This will save the file as a GIF and reduce the file size by quite a lot.

---
Dinosaurs had eggs bro, the chicken came way later.

6-29-06 6:16am (new)
quote : comics : pm : info


Injokester
Definitely drunk

Member Rated:

Intermediate guide: How to draw a character in paint

This guide and exercise will teach you how to draw in paint, not what to draw. It is designed to show you how to use the various tools to do what you want to do. I will be doing other guides later on how to design and construct characters and backgrounds.

To start off I’d suggest following this guide to trace the character I’ve prepared: DragonXero. Tracing the character will let you experience what you need to do to draw in paint, then you can move onto the other guides to learn the various art tricks you’ll need to develop your own style.

Save this image to your PC: http://i58.photobucket.com/albums/g245/Bob_Toomy/How%20to%20draw/DragonXero.png

This character is at the size you need to draw, and is drawn entirely with a 3 pixel thick line.

Before beginning, have a close look at the character. At this size it is easy to see how I draw. You need to think of the character as a series of lines, not as objects. An eye isn’t an eye, it’s a circle with 2 curved lines and a dot, the mouth is literally just a line, and so on.

The main tool you will need to use to draw a character like this is the Curved line tool. To get the hang of this tool start by tracing over DX’s pants. Begin with the straight lines at the edges and in the middle, then the curved lines for the pocket and unmentionables. To draw the line, click on one end of where you are placing the line, and drag it to the other end. To curve it, just click on the line near where it bends, and drag it so it covers the black lines that are already there. (Give it a go, you’ll see what I mean once you try it).

When you do it, use a 5 pixel thick line (the thickest), instead of the 3 pixels that I’ve used. Also, DO NOT draw in black. Change the colour to the fluoro green, bright red or a colour like that. This way your lines will be separate from the black outline of the original.

Don’t be afraid to zoom in- working at twice the size is much easier than normal size, and 4x the size easier still (so long as the line fits on the screen).

Important: Save often, and save backups. Each time you get a section correct, save it as a different name so you’ve got something to fall back on.

If you’re finding it difficult to get the lines right, save the below diagrams to your hard drive, and open them up in paint. Then you can zoom in and out to see exactly what I’ve done.

When you’re done, it should look like this:

[b][/b]

Don’t worry about going over the edges, there are tricks to fix this. You should work in different colours though, so that each line is separate. Also, don’t worry if you make a mistake. The best way to fix a mistake is to leave it as it is, and just trace over it with another colour, using the mistake as a guide. Then select your original colour and remove it by right-clicking and dragging the eraser over that colour- so that only the colour you don’t want is erased, leaving the fixed line.

Continue this for the rest of the body (don’t do the hand or the head for now), using different colours for each line. You can re-use the same colour, so long as it’s not touching a line of the same colour. Have a look at the diagram below to see exactly what you should do on each line.

The finished effect should be this:

[b][/b]

Before going any further, go back and fix up any mistakes. Try and correct anything out of place with the pencil, paintbrush and eraser tools (the pencil and paintbrush tools also erase, if you right-click them), and if it’s still not right, just draw a new line over the top.

As you can see, my lines aren’t perfect. There are still black dots over one shoulder and under the arm. These don’t matter for now, they’ll be fixed up a little later on.

Once you’ve drawn all the lines of the body and you’re happy with them, use the Fill tool to turn them all fluoro green.

TIP: Once you get the hang of it, you will generally only draw in two colours. To fill the lines all the same colour, select one line colour as the primary, the other as the secondary. Then just alternate between left and right clicking on one line, and it will fill all of them. (Just make sure to re-select white as the secondary colour when you’re done).

Now to draw the hand.

Unlike the body, the ‘lines’ of the hand aren’t drawn as single lines. Take a look at the enlarged diagram here to see what you should do for each line you draw. To add another line on, just start it from where the last one left off.

The hand might take a bit of practise, but bear with it.

Once you’ve got the hand looking right, fix any errors and colour the lines you’re keeping bright green.

Now onto the face.

To begin on the face, draw in the mouth and nose (the nose is one curved line, bent to that shape).

Next, draw the eyes. To do this, use the circle tool and draw a circle over the eyes, lining the circle up with the sides of the eyeballs. If you can’t get the circle in the right position, try drawing the circle to the right size off to the side of the character. Once you’ve got it to the right size, use the select tool to highlight it, copy it, and paste it over each eye (make sure you have opacity enabled).

After you’ve got the circle in place, draw lines over the top and bottom, like in the diagram below, and draw in the pupil with the paintbrush or circle tool (the largest circular paintbrush size can be used for the pupil, or use the circle tool if you want it to be larger). Also draw in the eyebrows above the eyes.

Now you have the lines in place, fill the sides of the eyeballs the same colour as the lines over the top and bottom, then un-fill the extra parts of the circle that are still there. Finally, use the eraser (right click), with black selected as the primary colour. Drag it over all the extra black areas around the eyes to clean them up and make sure they look right- but be careful not to remove any of the forehead or chin.

Next move on to the ear. The ear needs to be drawn in small stages, like with the hand. Don’t try and do too much at once, it won’t work. I won’t give you a diagram for the ear, you’ll need to figure this out for yourself.
After you’ve done the ear, do the back of the neck, and the top of the t-shirt. Then move on to the chin (one line), then the jaw (lots of smaller lines). Draw everything in, and colour it green at the end.

Next, move on to the beard. This is a little tricker than it looks. Start on the outside of the beard. The hard part is on the left side, where the line curves in a slight ‘s’ shape. Do this as two separate lines, according to the diagram below. After you’ve done the outside, move on to the inside.

TIP: Rounding a corner. If you are drawing a round area using small lines, sometimes they will end up as a point instead of a curve. If this happens, just draw a new line over the pointy bit and curve it out, then remove any unwanted parts with the eraser.

The last part of the outline is DX’s head. This is a LOT harder than it looks, and you’ll need to do it in stages. Use the tip above whenever you end up with a point.

Once you’ve done the head, the outline is done! (make sure you’ve coloured it all fluoro green). Now all you need to do is clean it up. Chances are, there are little black dots all about the place. In order to remove these, make sure that black is selected as the primary colour and white as the secondary. Then all you need to do is fill each white area with black, then un-fill with white. If there are still dots, do it again. Doing this will ‘pick up’ any loose black parts. Sometimes there will be a dot here or there that was surrounded by outline- get those with the eraser tool.

Once there are no black dots left and everything looks about right, use the fill tool to colour the outline black. Now choose a colour for the shirt and a different one for the pants, and use the fill tool to fill these areas. Make sure there are no gaps (there are usually single pixel gaps surrounded by the outline- fill these as well). The place most likely to have gaps is the top of DX’s left sleeve, where it meets the body.

Colouring the pockets: Some areas, like the little gaps on the pocket where DX’s arm reaches in, should be coloured slightly darker than the clothing itself. To do this, select the colour that you chose for the pants, and go to Colors-- >Edit Colors-- >Define Custom Colors. From there, move the little arrow on the right slightly downwards, so that the preview box gets slightly darker. Now fill the pockets.
Finally, colour the hair and skin. The hair should be dark brown. To make a nice dark brown, double click the brown colour in the palette, define a custom colour, and drag it downwards. You can also move the little cross hair in the middle section around to give a different tone. Move it towards the red or yellow for different types of brown.

In order to get a good colour for the skin, you can either change the colours in the same way until you find what you’re looking for, or you can ‘steal’ the colour from somewhere else. To do this, bring up another character that has skin the colour you want. Take a screen dump of the character, and copy it to the same window as DX, but off to the side (you may need to resize the canvas). Use the ‘Dropper’ tool to pick the colour you want, and fill the skin areas. Then just delete the character you copied in.

Once everything’s coloured then the character is done!

---
Dinosaurs had eggs bro, the chicken came way later.

6-29-06 10:22am (new)
quote : comics : pm : info


Injokester
Definitely drunk

Member Rated:

Advanced guide: How to resize characters.

Once you’ve got your first character drawn, you need to size it down for use with stripcreator. For this you’ll need Adobe Photoshop, or you can skip to the part of the guide titled “Your friend, the Windows Picture and Fax Viewer” for a quick fix. You can download a 30 day trial here: http://ftp.adobe.com/pub/adobe/photoshop/win/cs2/Photoshop_CS2_tryout.zip

PM me if you do download it, there are a few settings you might need to change, I’ll let you know what to do once you’ve got the program.

In order to submit a character on stripcreator, or to cut and paste it onto a comic, you’ll need to convert it to a GIF transparency, using the guide I posted earlier. Just follow the steps and see if you can do it. If you can’t, then for now just resize the image with the background included. To do this, make sure that the character you drew earlier is positioned in the top left of the canvas, and make the canvas as small as possible around the character.

Now open the character in paint, hold ctrl, and press the + key to zoom in until the character is full sized (there is a % number in the bottom left of the character window, this needs to be at 100%. Alternately you can just type 100 into that box).

Now press ctrl+shift+i to bring up the re-sizing menu. Change the height of the image to 175 pixels.

Finally, save your image under a different name to your original character, so that you’ve still got the original. Now host your character, and post it in the Artists corner topic so that we can see it.

Tip: If you accidentally save the smaller picture over your original, don’t panic. You can just ‘undo’ the last change with ctrl-z, or you can undo the other changes through Edit-- > Step Backwards. Once you’ve got the original back up, save it somewhere.

Your friend, the Windows Picture and Fax Viewer

If you don’t have or don’t want to get Photoshop, you can resize your character using the Windows Picture and Fax Viewer that is built into every version of windows. To do this, open up your character in paint, and resize the canvas so that it is 2000 pixels high (ctrl-e to bring up the menu). Save it as a different name.

Now open that new file up with the picture/fax viewer, and zoom out with the magnifying buttons until the character looks the same size as the ones on Stripcreator. (You can also use the track-ball on your mouse to zoom in and out). Once it’s the right size, take a screen capture, paste it to a new paint window, and crop away all the mess. If you look at it and it’s pixelated, or just looks horrible, close the picture/fax viewer and re-open it. The program isn’t designed to resize images, and if you zoom in and out too many times it will mess it up.

Resizing in this way will never give you the same quality as in Photoshop, but it does the trick to show your character in the forums.

---
Dinosaurs had eggs bro, the chicken came way later.

6-29-06 7:31pm (new)
quote : comics : pm : info


Injokester
Definitely drunk

Member Rated:

Tips on hosting.

If you just want to host the occasional image, the easiest way to do is with http://imageshack.us/

If you'll be uploading a fair amount of art, or want to create a gallery, take the time to register on www.photobucket.com so you can keep it all in the one place.

---
Dinosaurs had eggs bro, the chicken came way later.

6-29-06 7:35pm (new)
quote : comics : pm : info


Injokester
Definitely drunk

Member Rated:

Intermediate guide: How to modify art and create your own style

Now that you’ve drawn and resized your first character, it’s time for you to start creating your own art, and develop your own visual style. If you’re already good at art, you probably won’t need this guide.

The problem that most people make at this point is to make things too complicated. KEEP IT SIMPLE. In a comic strip, simple is always better. The truth is, when people read comic strips, they really just glance at the images. They’ll see the setting, what sort of characters you’ve got there, the pose of the characters and the expressions on their faces. These are the things to focus on. Don’t add too much detail either, it takes a lot longer, and you’ll lose most of it when you shrink the image down.

Most art guides will tell you to draw a series of ovals and lines to create a 3D template for your character to work from. I’m not going to do this- it’s difficult, takes too long and is a pain in the ass. What I’m teaching you to do is draw a simple figure, 45 degrees off-centre, that is perfect for use in text-heavy comic strips. If you want to use something more complicated, learn to do this first, then move on to the other guides that are out there.

The best way to create your own style at this point, is to base it on someone else’s work. For me that was Futurama and Family Guy. I took elements of both styles, and combined them with my own ideas to create the style I work with today. If you’re already an artist, then go out and find a style you like and see what you can come up with. If not, then I would suggest basing your characters on my own work (or one of the other SC art categories, preferably Kaddar’s work), as there are a lot of resources available to learn from (you can trace and modify the existing pictures), all set up perfectly for stripcreator.

In order to create your own style, everything you draw MUST be distinct from the style you’re basing it on, otherwise you’re just a dirty little thief. To do this, you need to change almost all of it in some way. When you’re drawing, the easiest way to learn it to load up one of my characters, enlarge it to 400% (copy it, ctrl-w in paint, change horizontal and vertical values to 400), and trace over the top without hitting the lines themselves (there are some tips at the bottom on doing this). Because of this, it’s much easier to create your own style of faces, while keeping the bodies similar.

The things you could look at changing:

The eyes- maybe make them circular, add eyelids, move them closer together, make them larger, make them smaller, etc…

The mouth and nose- create a new style of mouth or nose to draw on whenever you draw a character. Have a look at some of the cartoons out there and see what other people are doing. You can also position the mouth and nose differently to create a different effect.

The jaw, chin and cheek- this is a big one. Changing the shape of the face will make the character look very different. Maybe make the head smaller or larger, chubbier or more slender, rounder or more angular. Also you can change the shape of the head itself to any bizarre shape you like the look of.

The ear- Not a big change, but moving the ear up, down or closer to the eyes can have a big effect. You can also try using a more circular ear, and changing the lines inside the ear to make it look different.

The hair- Hair is a good thing to change, because something like outlandish hair styles will separate your drawings from everyone else’s.

Shading- Using different styles of shading is a great way to create your own style. Have a look at the example at the top to see what you can create by adding random colour patterns with a slightly darker or lighter shade of colour.

For now, have a look at the features you drew on DragonXero, and try and change a few of them (save a new file with the picture to work on, so you’ve always got the original to work with). Work your way through the list and change each feature a little at a time (make sure to give the man some hair!). If you have an idea, try it out- if it doesn’t work out, then go back and try something else. Never be afraid to try something new.

Here’s an example of some of the things to change on the character:

Don't worry that this example doesn't look very good- you can do better. I threw that together in about 2 minutes, just to illustrate what I'm talking about. The important thing is that it's completely different from the style I work with. You'll want to spend some time developing a drawing style, so that you've got something you're happy with.

You can also accessorize, by adding glasses or jewellery. (Just keep it simple).

The important thing here is to make your character look completely different to mine, otherwise what you’re doing is classed as plagiarism. You can’t steal someone else’s style, but there’s nothing wrong with using it to develop your own.

You should also try changing the facial hair. This won’t change the style of the character, but it will help to teach you how to modify existing art.

The reason I’m suggesting to just modify the face, is because you can add it onto bodies that are similar from the ones I’ve drawn. They are already the correct size and shape, and it’s easier to use these as a guide than trying to draw them yourself. For now just modify DX’s head, and leave it on the body it came with.

TIP: This one’s important. When you trace over an existing picture, you MUST do it with a colour that doesn’t appear in that picture. This is why I’ve been pushing the fluoro green. The reason for this is because you can use the feature under attributes to convert the picture to black and white, and instantly get rid of everything but the outline.

The way to do this is to complete your outline in bright colours, copy the entire image into a new paint window, then immediately delete it, like when you’re adding text bubbles to a comic. The difference is that this time you’ll need to fill the entire canvas with black (not light grey), making sure that opacities are turned on. This will make all the white areas black. Now you need to un-fill the entire outline, so that it become white. Once you’re done, hit ctrl-e to bring up the attributes menu, and click the puddle that says ‘black and white’. It will tell you that you can’t go back once you’ve done this, which is why you’re working in a separate window. Once you confirm, you will have a white outline on a black background. Now just hit ctrl-i to invert the colours- this will give you a perfect black outline on a white background, with none of the extra crap that was there before.

By now you’ll probably have noticed that all the colours on the palette are gone, and have been replaced with black dots. What you’ll need to do is select the entire canvas and copy it into a new paint window (so that you’ll have access to colours again), and save it as a new file.

Now that you’ve modified the head, you can try modifying the body, or try putting it on a new body. Modifying bodies is much the same, only you need to change the basics as you go- broad, narrow or slumped shoulders, wide or skinny legs, etc…

You’ll also need to change the clothes for each character.

TIP: When drawing clothing, make sure to make anything that goes over the top of something else slightly wider- shirt over pants, sleeve over the arm, etc…

Two or three pixels is enough to make it look like the character is wearing the clothes rather than that they’re painted on.

Once you’ve finished this exercise, you should be well on your way to developing your own distinct visual style. The truth is, tracing is the most useful method of drawing cartoons that a beginner can use. For now you’ll need to trace someone else’s work, but once you’ve got a few characters drawn up, you’ll have the resources to just trace your own. This is precisely how I draw.

Don't be worried if the style you develop doesn't seem as good as the one you're working from. This is common, because you're used to the other style. It'll also take some time to perfect your own style, and learn all the trick you'll need to use to be a cartoonist. The important thing is that you've got something of your own that you can develop into something awsome!

If you'd like to see the full-size original of the example at the top, you can find it here: http://i58.photobucket.com/albums/g245/Bob_Toomy/How%20to%20draw/DragonXeroMod2.png

The shading technique I used is more or less just random. I just darkened the areas on one side, and added a lighter area to the shirt using the paintbrush and fill tools.

---
Dinosaurs had eggs bro, the chicken came way later.

6-29-06 9:44pm (new)
quote : comics : pm : info


Injokester
Definitely drunk

Member Rated:

Basic guide: How to draw backgrounds

Making backgrounds is much the same as drawing a character, except that each background needs to be unique, making it a little more difficult.

With a background, you’ll need to choose whether to work at 400% or 300%. The problem with working at 400% is that you’ll need a canvas that is 1000 pixels wide and 1400 pixels high (backgrounds are 250x350 pixels in stripcreator). 1000 pixels is wider than you can load up in paint at any one time, so you can’t see all of what you’re working on.

Working at 300% will fix this- 750pixels x 1050 pixels. The problem with working at 300% is that your backgrounds won’t be at the same scale as your characters. If they’re the same scale, you can paste your characters straight onto the backgrounds, and shrink them down as a single image- thus removing the need for transparencies and making the image nice and smooth.

So you’ll need to decide- work at 300% for an easier task, or at 400% for a better effect. For the first couple of backgrounds I’d suggest working at 300% and getting the hang of it.

When you start with backgrounds, the easiest way to do it is to enlarge a really basic background to the size you want to work with (eg: my most basic wall) and then modify it to add new features and whatnot.

If you’re designing a whole new background, the easiest way to do it is to draw it at 100% size using the line and pencil tools, then blow it up to 300% and trace over it. This is especially useful if you’re working at 400% as you can design the whole thing at a size you can see.

When drawing backgrounds, perspective is ALL important. You have to draw the background FOR the characters, and keep in mind that if you want your backgrounds to end up on SC they have to be usable by the characters there- some are full figures standing on the ground, some are partly cropped, others are just torsos. Because of this you have to have a floor in the pic. To begin with, start with something really simple. Draw a wall, add in a window or a door, and so on. It’s always easiest to work on a front on view, don’t waste your time with walls that fade away as they get more distant, if you don’t yet know what you’re doing they’ll look terrible (I learned this the hard way).

Once you’ve tried something really simple, the next thing to try is tracing a basic photograph. If you’ve got a digital camera, take a photo of something simple and use that, or otherwise you can use the ones I’ve uploaded here: http://s58.photobucket.com/albums/g245/Bob_Toomy/How%20to%20draw/Photos/

The photos in that folder (and that folder only) are ones I’ve taken that are now in the public domain, and thus royalty free.

The advantage of tracing a photo is that the perspective is already there, you just have to ‘cartoonify’ it. Use your judgement and see if you can work out where to put the lines. Once you’ve got an outline, use the TIP from the previous guide to get rid of everything else, and then colour the background.

Unfortunately there isn’t much help I can provide when drawing backgrounds. Just keep in mind that perspective is all important, and that the bottom needs to have a floor suited to all the types of characters (some of the backgrounds I’ve done don’t have this, since I drew them to use with the characters I draw). Also look closely at the other backgrounds people have drawn for SC, and try to pick up any tips you can from there.

---
Dinosaurs had eggs bro, the chicken came way later.

6-29-06 10:38pm (new)
quote : comics : pm : info


BigFrank105
Obsessive Comic Disorder

Member Rated:

You rock, Injokester. This should almost be stickied.

7-02-06 3:07pm (new)
quote : comics : pm : info


boorite
crazy knife lady

Member Rated:

Awesome. MS Paint blows less than I thought now.

---
What others say about boorite!

7-15-06 10:27pm (new)
quote : comics : pm : info


mmyers
Passing through.

Member Rated:

As an avid user of Paint, this is awesome I must say. I had to figure all of that crap out the hard way.

---
Peeing sitting down is the gift you give yourself.

7-27-06 11:11am (new)
quote : comics : pm : info


Injokester
Definitely drunk

Member Rated:

I know exactly what you mean...

I figured there's a bunch of people out there wanting to know how to draw but with no idea how to get started.

---
Dinosaurs had eggs bro, the chicken came way later.

7-27-06 4:34pm (new)
quote : comics : pm : info


LuckyGuess
hm

Member Rated:


http://www.fayette.k12.il.us/99/paint/paint.htm

---
the kid's getting old, the kid's getting old

11-18-06 6:50pm (new)
quote : comics : pm : info


TheGovernor
Talentless Hack

Member Rated:

Just been messing about with Paint.net, its a free photo editor / paint thingy, very similar to ordinary paint but with a lot of cool features, worth a look.

http://www.getpaint.net/index.html

11-20-06 1:52am (new)
quote : comics : pm : info


Injokester
Definitely drunk

Member Rated:

How to get photoshop


Download it here: http://ftp.adobe.com/pub/adobe/photoshop/win/cs2/Photoshop_CS2_tryout.zip

Then get these keygens
http://rapidshare.de/files/2707793/Adobe_Photoshop_CS2_Tryout_to_Full_Activation.zip.html
http://rapidshare.de/files/2409183/Adobe_Photoshop_CS2_KEYGEN.rar.html

Download all three, install photoshop, and use the "tryout to full" keygen when electing the full version. Later it will prompt you to activate. It will then try and contact the Adobe site, click cancel. Next choose the option to activate by telephone, then use the second keygen to get the final code. The process may vary with the newest version and seems to be a little different according to your OS, but you get the idea

---
Dinosaurs had eggs bro, the chicken came way later.

12-12-07 2:58am (new)
quote : comics : pm : info


Creative4me
Pink Donkey Wrangler

Member Rated:

aWSOME GIDE.

---
I looked at two peeled bananas and realized what they really were. They were Weiners!

12-12-07 8:41pm (new)
quote : comics : pm : info


ZMannZilla
Ex-Zombie Hunting Dad Creature

Member Rated:

I have to admit, I understand Paint a lot better now. However, I'm still not convinced that I shouldn't be using Fireworks for all my "convert-for-web" needs. I just like the Export function on it a lot better.

But I do have a question - When creating art for Brad's consideration, I noticed that both GIF and PNG were presented as options. Which one does Brad prefer? I want to contribute some art but I want to get it right so that his own workload would be minimized.

---
"He was cursed with a horrorshow of a face, like Guiseppe Archbold doing a study of mollusk tumors."

2-12-08 11:32pm (new)
quote : comics : pm : info


Scyess
Official Traveling Menstrual

Member Rated:

This might not be appropriate for this thread, but I thought I should do my best to keep it bumped, since it's really useful.

What easy-to-use (and free) tools are out there for creating animated GIFs?  Specifically, I'm trying to get rid of the horror that is Flash on this page (along with other obvious flaws, such as the music), but the site owner wants to keep the stupid flashing buttons.

Does anyone know what I can do?  Or better... want to create the button GIF (on a transparent background) for me?

---
"Old" is the old new.

4-02-08 6:44pm (new)
quote : comics : pm : info


Injokester
Definitely drunk

Member Rated:

Can't help you there I'm afraid, I've never played around with GIFs enough to worry about getting good software.

This has come up on GD a few times, if you post a topic there I'm sure you'll get a good answer (followed by a lot of off-topic discussion and random pictures with captions).

---
Dinosaurs had eggs bro, the chicken came way later.

6-26-08 1:28am (new)
quote : comics : pm : info


ArtemisStrong
masturbating to Japanese shit porn

Member Rated:

Biped must know.  He's making animated gifs all the damn time.

---
Ham-fisted ham fisting.

6-27-08 5:03pm (new)
quote : comics : pm : info


faggot
Member - Tobor Fan Club

Member Rated:

Great Scott, awesome!

---
asssss

8-10-08 4:14pm (new)
quote : comics : pm : info


LittleRocker
The Return

Member Rated:

ok i'm usi ms paint, i made my guy, now what do i do? i read on how to connvert it but thats only for photoshop!

3-17-09 9:37pm (new)
quote : comics : pm : info


RCCOLAMAN
Saving the world from thirst since 1905!

Member Rated:

Scyess

You can use The GIMP to create animated GIFs, there exist several tutorials on how to create them, just do a google search to find them.good luck! And thank you Injokester for all the helpful info.

3-27-09 10:51pm (new)
quote : comics : pm : info

Stripcreator » Photoshop Valley » How to use Paint


reload page with comics

Jump to:

Post A Reply


stripcreator
Make a comic
Your comics
Log in
Create account
Forums
Help
comics
Random Comic
Comic Contests
Sets
All Comics
Search
featuring
diesel sweeties
jerkcity
exploding dog
goats
ko fight club
penny arcade
chopping block
also
Brad Sucks